

Your bike may be made to look brand new again by installing new handlebar grips. The handlebar grips on your bike may appear to be a minor component. However, they are essential to comfortable bike riding. Your handlebar grips are crucial for maintaining control of your bike. They serve as the points of contact that secure your bike to you, together with your pedals and saddle. Grip quality can significantly affect how comfortable and in control you feel while riding. So, how to install rubber handlebar grips perfectly?
How to Install Rubber Handlebar Grips – Tools You’ll Need
Let’s first understand some fundamental facts regarding handlebars before we start teaching you “install rubber handlebar grips”. Normally, we use a lock-on or slip-on system to secure grips to the bar. Your grip is a standard diameter. Therefore, you won’t need to bother about getting the right diameter grip. Even though certain options appear to be smaller, they may stretch to fit around a regular bar. There are numerous options for length. However, most riders don’t obsess over grip length. You can gently modify the location of your shifters and brakes to account for any length differences from your old grips.
These are the necessary tools for mounting install rubber handlebar grips on your bicycle. You won’t need all of these tools. Pick whatever you have access to from these items.
- Replacement Rubber Handlebar Grips
- Razor Blade/Scissors
- Rubbing Alcohol
- Other Alcohol-Based Solution Products (If Rubbing Alcohol is Unavailable)
- Air compressor
- Adhesive spray like hairspray for extra holding power
- Soap and Water
- Plastic Ties
- Hammer
- Screwdriver
- Wrench
Step One: Remove The Old Bar
Now that you know what tools are necessary, let’s learn install rubber handlebar grips. First, remove any bar end plugs that may be present before we remove the grip. With a tiny screwdriver, you can typically pry them out. Save these for backup use. Most brand-new grips include fresh bar M plugs.
Slip-On Grip
There can be a compression plug on some grips. Remove slip-on grips by loosening them. Don’t pull too hard, please. Soft rubber can break, which makes removal more challenging.
Option 1 – To create a space between the bar and the grip, use an air compressor.
Option 2 – You can wedge it up with a tool. To make them slide off, lubricate them with alcohol.
Option 3 – Use scissors or a blade to cut through the grip if all other attempts fail. With carbon fiber bars, avoid using this technique. The handlebar will get weaker if the surface is scratched. Aluminum or steel will only sustain visual damage when scored.
Lock-On Grip
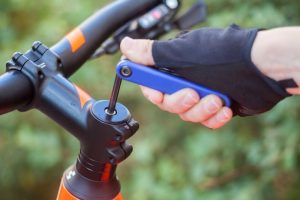
Loosen any bolts or screws that are locking lock-on grips to the bar. Usually, they are hex shapes measuring two and a half millimeters, three, or four millimeters.
Step Two: Clean The Bar
Clean the bar off with a non-residual cleaner. So that it is free of pollutants and oils. You can also clean the bars with soap and water to remove WD-40, dust, and grease. By doing this, installing new grips will take less time. Make sure to dry the inside of the bars first if the ends are open. None of us want to replace the install rubber handlebar grips too soon or remove rust from them, which is what can happen if water gets trapped within.
Step Three: Use Plastic Ties or Rubbing Alcohol
Now, we’re doing one of the most crucial parts of “install rubber handlebar grips”. You can now slip the grips on. It can be a little difficult, especially with the snug-fitting grip.
Slip-On Grip
Option 1 – When putting the grips on, blowing air between the bar and grip can be useful.
Option 2 – Take three to four lengthy plastic ties as “runners” for your grip. Put the plastic ties in the grip on various sides, then slip the grip onto the bike using these slick, low-friction locations. Simply take the ties back out to complete the installation.
Option 3 – Another popular method is using alcohol as a lubricant. Spray some alcohol-based liquid on the grip and the bar. The alcohol under the grips may need a few hours to dry.
Option 4 – You can use an adhesive spray as a lubricant if you want the surface to have more gripping strength. As it dries, the grip will be secured to the bar. Even some mechanics spray their hair. Some adhesives could take a day or more to completely dry.
Lock-on grips
You just slide the grip in place and position it wherever you like. Adjust the torque to the manufacturer’s recommended setting. Put the grips on and then attach the bar M plugs. These are crucial components of your bicycle. It needs to be regarded as a safety component. Simply tighten the compression plug until it is snug if you have one.
Step Four: Push The Grip
As you twist to align their curves, fully press the grip against the bar. Twisting it as you push can help you gradually get it onto the handlebar. Be patient as you gradually attach install rubber handlebar grips to a bicycle.
Install the bar end plugs after you’ve installed the handlebar grips. You can hammer them on or put them on by hand.
Now you know install rubber handlebar grips. You’re ready to ride with your new bike grip after you’re convinced that the new grip fits well. You’ll be grateful that it stays on during the ride even though the snug fit may make it difficult to get a grip on.
Why Rubber Handlebar Grips Are a Good Choice
For good reason, rubber is the most typical material utilized for bicycle grips. Rubber grips are durable and resistant to dirt. It is appropriate for a range of riding circumstances. Furthermore, they are reasonably priced. Therefore, it’s a preferred option for bicycle producers. The textures and designs of rubber grips range from smooth to knobby. Additionally, it comes in many colors to complement your bicycle. Rubber is excellent for install rubber handlebar grips since it is non-slip and elastic. Additionally, it is extremely impact-resistant and durable. However, due to the material’s roughness, installing rubber grips can be challenging.
Conclusion
Since you’ve reached this section of our guide, we can assume that you know perfectly install rubber handlebar grips and that’s it! You’re all set to hit the trails or the road. There are two methods for installing the grips: slip-on and lock-on. The lock-on system is becoming more popular because they are simpler to install. That doesn’t imply that the slip-on system is especially challenging. You only need a few tools and some patience. It will take some time to install rubber handlebar grips. But once you’re done, riding your bike will be secure and comfy for you.

2 thoughts on “How to Install Rubber Handlebar Grips in 4 Easy Steps”