
If you want to know How To Clean A Mountain Bike, then you are in the right place. I will guide you step by step on how to clean your mountain bike.
Cleaning a mountain bike might seem like a daunting task, especially after a challenging trail ride that leaves every nook and cranny covered in mud and grime.
However, as someone who has taken on this task numerous times, I can assure you that it can be a surprisingly straightforward and satisfying process with the right approach and tools.
Frequent cleaning ensures optimal performance for your next ride and keeps your bike looking great. It also extends the life of its components.
I’ll provide my insider knowledge and detailed directions in this article on how to Clean A Mountain Bike properly so that it goes from a dirty, muddy mess to a spotless riding machine.
How To Clean A Mountain Bike? Step By Step Guide
Here’s a step-by-step guide on how to clean a mountain bike:
Setting Up the Wash Area
Choose a location with good drainage, sheltered from wind and rain. Use a stable bike stand to keep the bike off the ground, preventing dirt from splashing back. Ensure the area is well-lit and spacious.
Preparing Equipment
Set up a bike stand that allows 360-degree rotation for easy access.
Have a brightly colored bucket to spot oil or residue, two brushes (soft and firm), a hose with cold water, and mild cleaning products like dish soap.
Avoid using pressure washers or car cleaning products, as they can damage your bike.
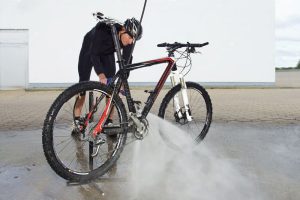
Rinse and Foam
First, secure the Clean A Mountain Bike on the stand and rinse it from top to bottom with cold water. Fill a bucket with warm water, and using a clean, soft brush, apply washing liquid to it.
Foam the entire bike, beginning at the front and working downwards to avoid re-soiling cleaned areas.
Tires and Drivetrain
Clean the tires and drivetrain using a firm brush, warm water, and soap. Check tires for damage and signs of punctures.
Clean the cassette and drivetrain thoroughly, removing any debris. If heavy grease is present, remove the cassette for cleaning to avoid damage instead of using a degreaser.
Rinse And Inspect
Begin by rinsing the bike thoroughly using either a hose or a gentle brush, starting from the top and working your way down.
While doing so, closely examine the bike for any signs of damage to the frame, components, or wheels.
Concurrently, rotate the pedals to allow water to flow freely through the links of the chain. A slack chain will facilitate a more thorough cleaning process.
Repeat
Depending on the dirt and grime accumulated, you may need to repeat the procedure before the bike is impeccably clean.
If the bike is exceptionally dirty, consider removing the wheels for a more comprehensive cleaning. Pay special attention to the jockey wheels and chainring, as these areas tend to trap compacted dirt and grime.
This is crucial because a dirty drive chain can increase friction, wear, and a higher risk of mechanical issues.
Ensure meticulous cleaning around the suspension seals, as any grit trapped there can lead to costly damage. If the wheels were removed, remember to reattach them securely.
Rinse Once More
Thoroughly rinse the bike to ensure no soap or cleaning products are left behind, as they can cause issues.
It’s advisable to avoid using a pressure washer for this step, as it can inadvertently strip away essential grease from bearings, headset, pivots, bottom bracket, hubs, and jockey wheels.
Instead, opt for a gentle flow of water from a hose or a bucket of clean water and a soft brush, as these options are more gentle on your bike.
Drying
Remove the bike from its stand. Position the bike in direct sunlight or a dry, preferably warm, area to allow residual water to drain and dry naturally.
Additionally, you can use a lint-free cloth or paper towel to remove any excess water. If available, an air compressor can be handy for quicker drying.
While you’re at it, take a moment to inspect your brushes and bucket to ensure they are clean and ready for future use, and note any supplies you’ll need for your next cleaning session.
Frame Care
Start by removing the wheels and placing the bike securely back in the stand. When considering frame maintenance, use a silicone-based polish and a microfiber towel, especially if you anticipate riding in wet or muddy conditions.
This protective layer will deter mud from adhering to the frame, preventing unnecessary weight gain.
However, if you’re uncertain or aware that you’ll be riding in a dry, dusty environment, it’s best to skip the polish, as it can attract and retain dust on your bike.
Always apply the polish onto a lint-free cloth and gently rub it onto the frame.
Avoid direct spraying, as it could lead to overspray onto the rotors and potential contamination of the brake pads.
Additionally, cycle the forks and rear shock through their full range of motion to dislodge any dirt near the seals.
Afterward, wipe away any residue and lubricate the stanchions using a specialized suspension lubricant or a small amount of fork oil.
Proper Storage
Once your bike is completely dry, it’s essential to lubricate the drive chain, ensuring that any excess lubricant is wiped off.
Apply a water repellent to the bearing surfaces to shield them from water droplets that may collect on the seals.
Consider hanging your bike with the front wheel elevated using a hook for optimal storage.
This arrangement keeps the brake levers positioned higher than the calipers, preserving the brake system.
Additionally, it allows the lubricating oil in the forks to rest on the foam seals, maintaining their moisture for smooth performance when you ride again.
Moreover, this setup facilitates the drainage of any trapped water in cables or frame pockets.
What Supplies Do You Need To Clean Your Mountain Bike?
Cleaning a mountain bike thoroughly requires a range of supplies to ensure every component is cleaned and maintained properly. Here’s a detailed list of the supplies you’ll need to clean your Clean A Mountain Bike:
Water Source
Access to a hose or a bucket of clean water is essential for rinsing and cleaning your bike. A hose with a gentle spray nozzle is preferable for a controlled water flow.
Bike Stand
A stable bike stand or workstand will make the cleaning process much easier by elevating the bike to a comfortable height, allowing you to access all bike parts without bending over.
Bike Cleaning Brushes
Various types of brushes are useful for different parts of the bike. You may need a soft brush for the frame and components and smaller brushes for cleaning areas like the chain and cassette.
Bike-Specific Cleaning Solution
Choose a bike-specific cleaning solution or a mild detergent that won’t harm the bike’s paint, frame, or components. Avoid harsh chemicals that can damage the finish or components.
Chain Cleaner
A chain cleaning tool or solution is essential for effectively removing dirt and grime from the chain.
Microfiber Towels and Lint-Free Cloths
These are necessary for wiping down the bike and applying polish or lubricants without leaving lint or scratches.
Degreaser
A bike-specific degreaser helps clean the drivetrain, including the chain, cassette, and derailleurs.
Silicone Polish
Silicone-based polish is used to protect the frame and make it easier to clean in the future. It’s particularly useful for wet and muddy conditions.
Suspension Lubricant or Fork Oil
If your Clean A Mountain Bike has suspension forks or shocks, you’ll need the appropriate lubricant or oil to maintain these components.
Water Repellent
A water-repellent spray can be applied to bearing surfaces and seals to protect them from water damage.
Soap
You’ll require diluted soap for cleaning the frame, and you can use any versatile soap for this purpose. Alternatively, you have the option to purchase a pre-made bike cleaning solution.
Bike-Specific Grease
Grease is essential for lubing various parts, including headset bearings, bottom brackets, and pedal threads.
Chain Lubricant
A suitable chain lubricant keeps the chain running smoothly and prevents premature wear.
Optional Accessories
Depending on your preferences and specific cleaning needs, you may also consider items like a pressure washer (used with caution to avoid damaging sensitive parts), a bike-specific tool kit for disassembly and maintenance, and a bike cover for storage.
Remember that regular bike maintenance is essential to keep your Clean A Mountain Bike in optimal condition and extend its lifespan.
Having the right supplies and using them correctly ensures a thorough and effective cleaning process, promoting the longevity and performance of your bike.
What Should You Do After Washing Your Bike?
Rinse Thoroughly
This step involves using clean water to wash away any soap or cleaning products from the bike after the initial cleaning process.
Drying
After rinsing, proper drying is essential to prevent rust and corrosion. This section outlines different drying methods, including air drying, towel drying, and the use of an air compressor.
Lubricate The Drive Chain
Once the bike is dry, applying lubricant to the drive chain is crucial to ensure smooth shifting and reduce wear.
Coat Bearing Surfaces
Protecting bearing surfaces, such as those in the headset, bottom bracket, and hubs, is important to prevent water damage.
Proper Storage
This section guides how to store your bike correctly, including hanging it vertically, positioning brake levers higher than calipers, and facilitating drainage.
Conclusion
A Clean A Mountain Bike requires careful washing, rinsing, and inspecting the entire bike during cleaning.
Paying attention to details such as the chain, jockey wheels, and suspension seals is crucial to prevent wear and mechanical issues.
Polishing the frame adds protection and shine. After cleaning, proper drying, lubrication, and protection of bearing surfaces are essential.
Storing the bike with care, including hanging its front wheel up, maintains its condition and ensures smooth rides.
Regular bike cleaning and maintenance are important for safety, performance, and longevity.
If you have any other questions on how to clean a Clean A Mountain Bike, be sure to comment. If you like this article, don’t forget to share it with your friends.

Wonderful web site Lots of useful info here Im sending it to a few friends ans additionally sharing in delicious And obviously thanks to your effort
Wow amazing blog layout How long have you been blogging for you made blogging look easy The overall look of your web site is magnificent as well as the content
certainly like your website but you need to take a look at the spelling on quite a few of your posts Many of them are rife with spelling problems and I find it very troublesome to inform the reality nevertheless I will definitely come back again
Thanks you
Thanks you i will trying my website solving the problem